9.30.2010

{halloween} Boo Bash invitation

I have something fun to share with you today - a simple invitation that I made for my family's upcoming Boo Bash.  It's a Mad Science theme and the children will get to make gooey green slime, among other things.  So, here's what I came up with:


On the front, the invitation reads:
The Dorfman Ghouls ... err, Girls invite you to Experiment with Fun!

On the back, it says:
Purpose: To celebrate Halloween
Hypothesis: Curious Kids will have lots of fun!

With gooey green slime involved, I knew that I had to capture it and the [most-likely] mess on the invitation.  I searched high and low for a 'splat' until I found it on the Dreams Come True Cricut cartridge.  Who knew the Princesses, or rather Ariel's splash, could play a part in my Halloween design?!  Anyway, the 'splat' my focus for the invitation design.  I think it came out quite cute.  What do you think?

9.28.2010

{in season} Butternut Squash

I absolutely love being inspired from blog readers, especially when it's a new recipe!  Today's inspiration comes from my friend, Stacy of Everyday Celebrations in NJ.  She responded to my blog entry last week on Sweet Roasted Grapes, suggesting Butternut Squash and Caramelized Onion Galette as her go-to- recipe for cocktail parties.  She shared this recipe; it looks so yummy - I just knew that I had to share it with you!  Thanks, again, Stacy!


I love butternut squash in soups, mixed with pasta and now, in a galette.  What is your favorite fall food?  Please share and include a recipe.  I'm ready to experiment in the kitchen!

9.24.2010

{fall cocktail parties} recycled sweater vases

This clever decor idea is my best find all week - recycled sweater vases! I love, love, love it!


This is the how-to article on making recycled sweater vases.

So, what sweater will you recycle?  I'm thinking beyond fall to winter.  I could reuse my girls' outgrown holiday sweaters to make a cute Christmas display and fill the vase with holly branches, cranberries or faux snow.  The possibilities are endless!  However, you decorate, have fun!

9.23.2010

{fall cocktail parties} Food and Beverage Calculator


Pondering how much food and drinks to serve at your cocktail party?  Here is some general guidance:

10-12 pieces of appetizers per person
2 drinks per person for the first person, 1 drink per person each additional hour
1/2 lb. of ice per person (double up in warmer temps) (more ice to chill beverages)
6 cocktail napkins per person (especially if passing hors d'oeuvres)
Offer soda, juice and water for non-drinkers and designated drinkers

For more information, incuding bar set up and a drink calculator, I encourage you to read this article.

Another 'posh in a pinch' idea.  Need a passing tray?  In a pinch, use a charger, you know the big base plate under your dinner plate.  They are about the same size, have a lip to avoid spills and cost a fraction of the price.  Take a look ...


L: 15.5" tray - $30, R: 13" charger - $16 - both from Crate and Barrel

Are you ready to party now?!  Any clever cocktail party ideas to share?

9.22.2010

{event showcase} Party Animals 4th Birthday

I interrupt the fall cocktail party series to share a special party with you!

Earlier this month, my little girl celebrated her 4th birthday.  We hosted a party at The Little Gym and invited all of her school friends.  Originally, I planned an easy, no-fuss party - gymnastics with cupcakes and juice for 20-25 girls and boys, done in 90 minutes - but the creative person within had grand ideas for invitations and party favors and wanted to experiment with making party hats, plus the event date was moved up to avoid conflict with another friend's party.  So big ideas, little time ...her Party Animals party quickly became a 3-Ring Circus ... but it was fun and I can't wait to share it with you!

I had a lot of inspiration in planning this party - my daughter's stuffed bunny, the Everyday Paper Dolls Cricut cartridge and Paper Source's new colors, Peacock (blue) and Sunshine (yellow).


Invitations: little girl paper doll with bunny, cat and dog on A7 yellow flat card tucked inside an A7 peacock envelope with a white 2.5" white round label (not shown).


My little ... sorry, BIG girl!


Name badges: I designed name badges for the children - and made a special one for my husband (above left).  If you know my husband, you're probably laughing.  Deep within he's a Party Animal ... really!

Party Hats: party hats are popular with preschoolers so I thought I'd try making them.  Surprisingly, every tutorial said to unfold an existing paper hat and trace it to make a template.  I did.  They turned out pretty cute but this is probably one party detail I'll either leave out or buy next time.

To make, I used yellow cardstock for the hat and embellished with 18" of red ribbon on both sides, red pom at the top and Party Animal label on the front.

Decor: finding Peacock blue disposable items was challenging so I went with yellow table cloths and red plates, plates and napkins.  The Litte Gym provided the balloons.


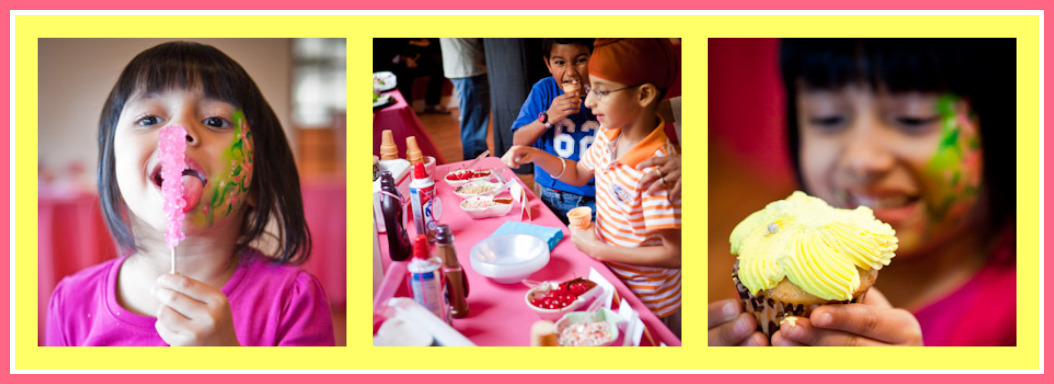
Cupcakes: I made homemade vanilla and chocolate cupcakes with blue, yellow and red sugar sprinkles in bright yellow wrappers.  To reinforce the Party Animals theme, I embellished them with paper toppers - bunnies, cats and dogs on blue and yellow cardstock circles.  They looked so festive ... and tasted so yummy!


Goodie Bags: I prefer party favors that last longer than the car ride home.  So I made Party Animal chalkboards inspired by this great idea.  I spray painted the border and then, wrote 'Party Animal!" and traced the paper doll with an Elmers red paint pen.

The chalkboard was inserted into a plain white bag with a box of chalk and embellished with red tissue paper, 'Party Animal' thank you tag and blue and yellow ribbon.

The chalkboards took a lot of effort but it was so worth it to see the children, including my niece above, drawing right away!


My daughter celebrated her birthday two days later in school.  I extended the Party Animals theme by bringing in Animal Crackers for snack.  The kids enjoyed identifying animals and I felt good about serving a low sugar snack!

Thanks for allowing me to share my work with you.  I hope that I have inspired your next party!

9.21.2010

{fall cocktail parties} DIY Cocktail Napkins

It's the small details that excitement me when I entertain!  For example, I think it's clever to embellish solid, inexpensive cocktail napkins with a rubber stamp.  The possibilities are endless like Merlot-colored grapes stamped on gold napkins; gold flourish design stamped on rust colored napkins; or a perennial favorite - white monogram stamped on black napkins.

{photo credits - here and here)

Ready to stamp cocktail napkins?  It's really quite easy! 

You'll need:
cocktail napkins
rubber stamp
slow drying ink pad
detail embossing powder
embossing heat gun

Directions:
Blot ink pad to rubber stamp
Stamp cocktail napkin
Sprinkle embossing powder on design; shake off excess (save for the next napkin)
Heat stamp design in slow circle motions, holding gun about 2 inches away

I recommend practicing a few times on scrap paper before stamping napkins.

Cheers!

9.20.2010

{fall cocktail parties} Sweet Roasted Grapes


It is officially fall this week!  To celebrate, I'm writing a series of blogs on fall cocktail parties and featuring fun, quick and clever entertaining ideas to inspire you. 

First up, Sweet Roasted Grapes ... to accompany an artisan cheese and crackers display!  Originally discovered on Hip Hostess, the recipe is from Food Network.  The photo looks yummy and the directions seem easy.  My husband and I are going to our first fall cocktail party this weekend; I think I'll make some as a hostess gift. 

What do you think of serving Sweet Roasted Grapes - thumbs up or down?  If you have an upcoming cocktail party, what will you serve?  Please share and inspire us!


9.17.2010

{in season} Quick Pickles from Garden Fresh Cukes!


Look what I found in my girls' garden?  Cucumbers!!  While I don't have a "green thumb", I do enjoy experimenting with new recipes.  We'll be making Rachael Ray's Quick Pickles this weekend.  Only takes 5 minutes; what could go wrong?!

However you spend it, enjoy the weekend!

9.16.2010

Notes of Distinction (are EZ to make)!

Today's post is not about parties and celebrations but it is something you can make - quickly, easily and affordably.  Note pads.  I made some note pads for my business as thank you gifts to potential clients.  I call them 'Notes of Distinction' because I include high-level information about me and my business yet clients can take notes during our conversation and throughout the planning process.  So far, it's been a hit!

{cover and inside cover}

The instructions for making E-Z Notepads are on the Paper Source blog.  It really is E-Z.  Give it a try!

What creative ideas do you have for making business gifts?

9.13.2010

Cocktail Napkin Poms


Got leftover cocktail napkins?  Then make paper poms!  Poms are very popular decor for parties and celebrations!  They are easy to make and cost very little, especially when you repurpose leftover cocktail napkins, which are sturdier than tissue paper.  Thanks to P is for Party for sharing this great idea.

9.09.2010

Wine Decanter Vase


Need a vase?  In a pinch, use a wine decanter!  This clever idea comes directly from the Fortessa Outlet Store.  Their wine decanters are $9.99 and they offer a 'how to' video for arranging flowers.

What is your 'posh in a pinch' idea?

9.06.2010

{event showcase} Sweet 1st Birthday Party


Last month, I had the honor of producing a first birthday party for the sweetest little girl.  Appropriately, her mother wanted a {sweet} theme complete with cake, cupcakes, cookies, ice cream cones and candy not to mention a lunch buffet and entertainment for the children.  Below are some of the details to inspire your next {sweet} celebration!

The party was held in the Auditorium at Frying Pan Park Visitors Center.  It's a lovely space for a small gathering.  The room was instantly transformed with a little color - pink lemonade and sunshine yellow.


This was the dessert buffet.  The display included birthday cake and a separate smash cake, as well as a tower of cupcakes and tiers of lemon bars, raspberry cookies and macaroons.  So yummy!


This was the candy table.  Guests were invited to scoop up a few candies to take home.  Pink and yellow candies included jelly beans, M&Ms, rock candy, salt water taffy, sunkist chews and pineapple licorice, as well as milk chocolate covered almonds for the adults.


Kids had a blast eating candy and cupcakes and making ice cream sundaes!  The ice cream station included vanilla, chocolate and strawberry ice cream served in small styrofoam coolers wrapped in tissue paper; cherries, chopped nuts and sprinkles; chocolate and caramel syrup; and whipped cream!


Children were entertained with face painting and balloon sculptures!  Pretty impressive work!


For table centerpieces, we used washcloth cupcakes set on a pink melamine plate (mine) atop a plastic cake column.  It was simple and mostly inexpensive considering the washcloths are reusable - love, love, love it!  Children took home their goodies in a cupcake felt treat bag embellished with a custom tag.


Isn't she adorable?  So sweet!


Photos were graciously provided by my client and her photographer, Christine Meulemans Photography

Additional vendors included Lille Patisserie (desserts), Festive Effects (face painting and balloons), Saint Germain Catering (lunch buffet) and BBJ Linen (linens).

40 Sucks Milestone Gift

Yesterday, my family and I went to a 40th birthday party.  We took the guest of honor, my husband's friend since Kindergarten, a really fun gift - a box of lollipops that read "40 Sucks" with a gift card tucked inside.


I was inspired by this blog post from Everyday Celebrating.  The gift was so easy to make.  I filled an existing gift box with floral foam topped with shredded blue and green paper; inserted 40 [Dum Dum] lollipops; and placed a piece of striped scrapbook paper on top which I embellished with circles, letters and numbers from my Cricut machine. 

Our friend has a great sense of humor; I'm positive he will enjoy our funny gift!

9.01.2010

Wine Glass Candle Holder


I love this 'posh in a pinch' idea!  Repurpose your wine glasses into candlestick holders. 

How to:
Turn your wine glass upside down and place the candle pillar on the base

Extra touch:
Place a flower under the wine glass.  Autumn leaves with an acorn would look lovely for fall dinner party or maybe a sprig of holly with berries for Christmas.